Waves of the Ocean Friendship Card

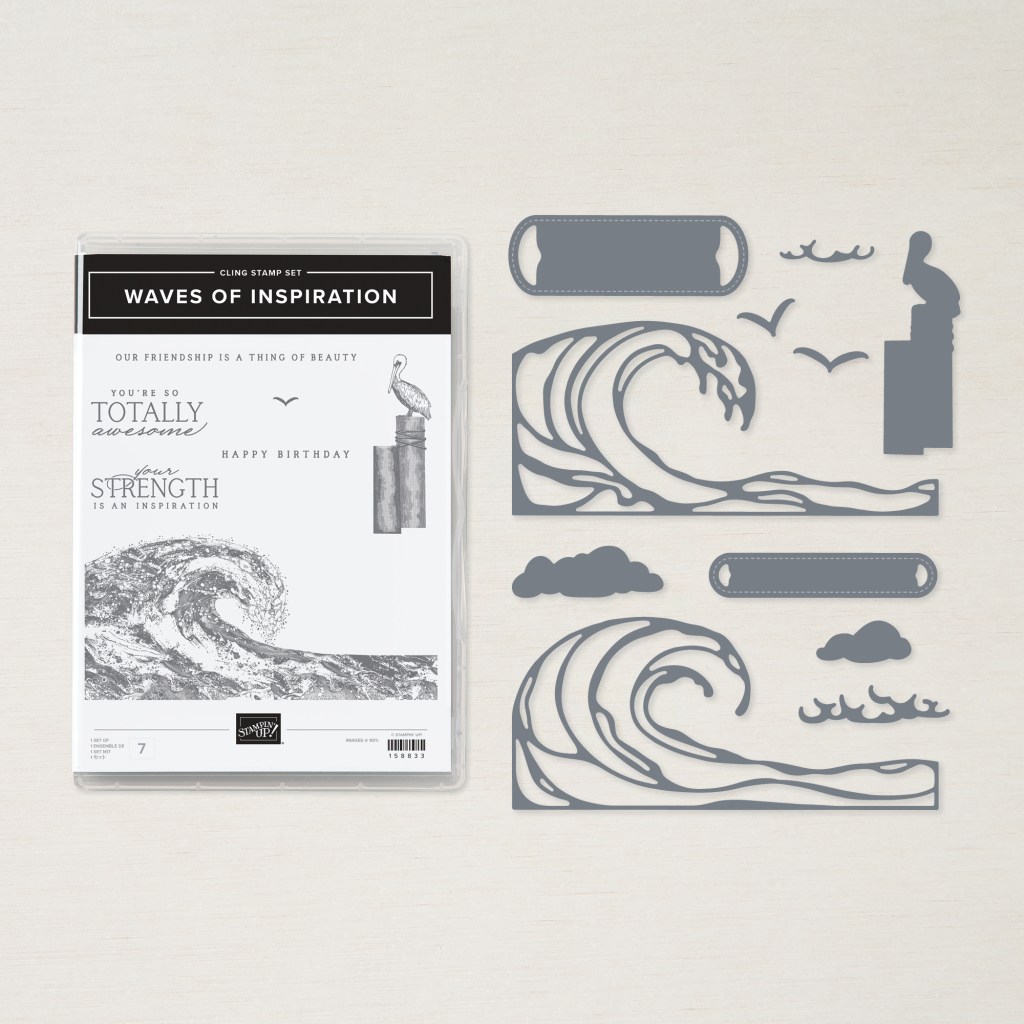
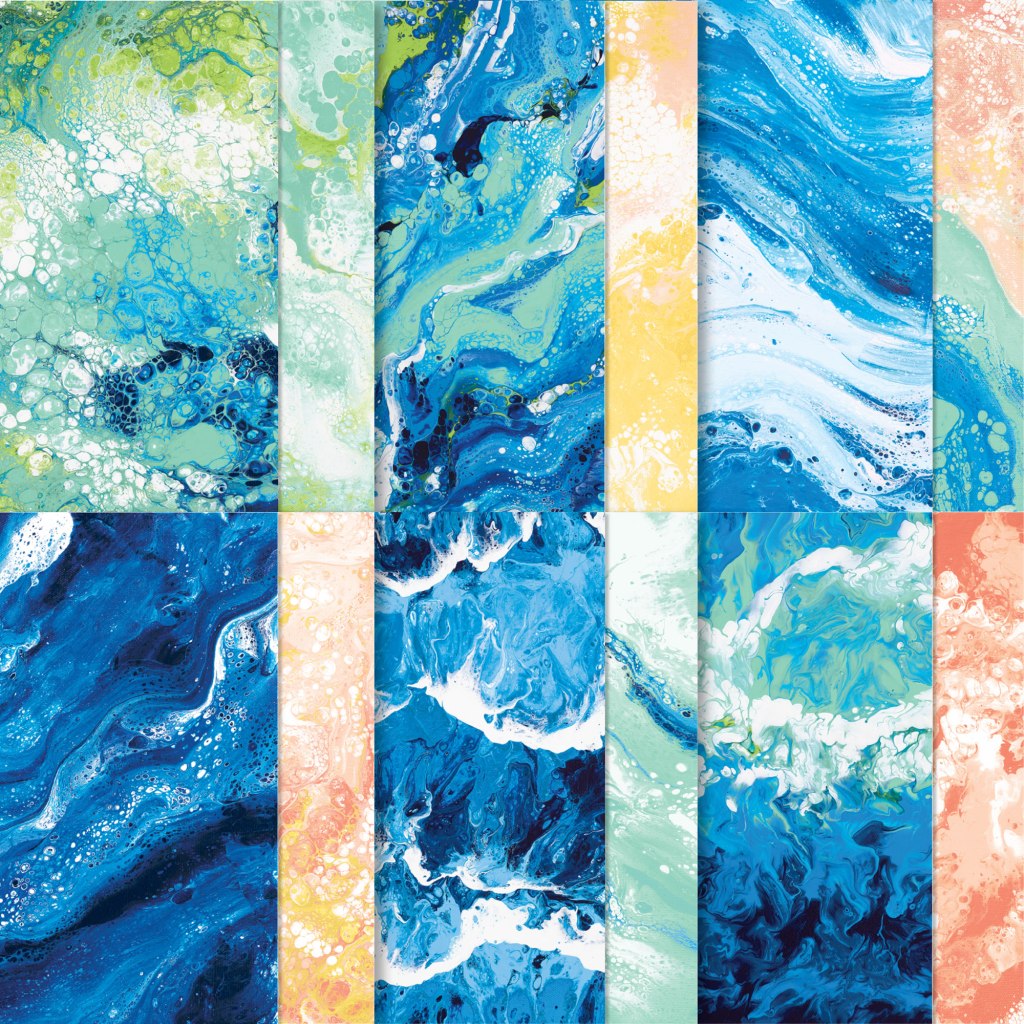
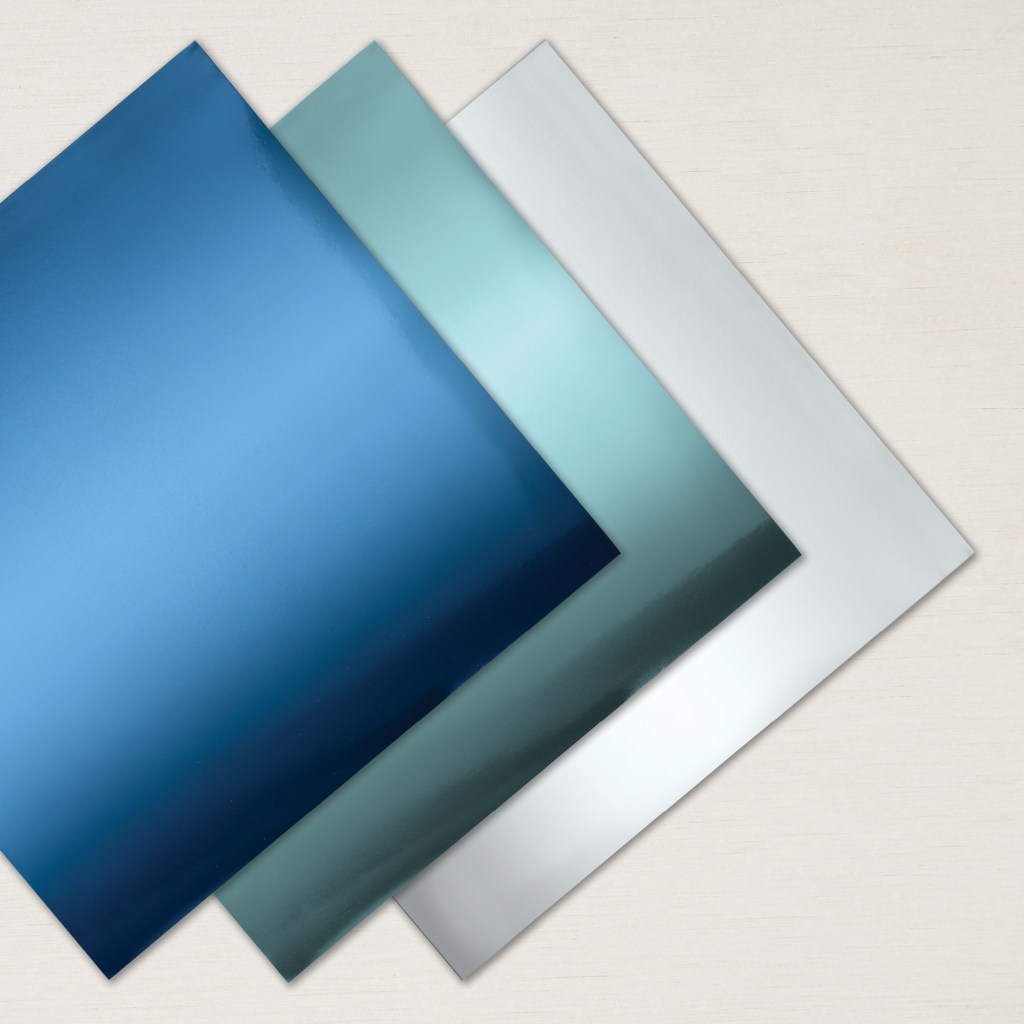
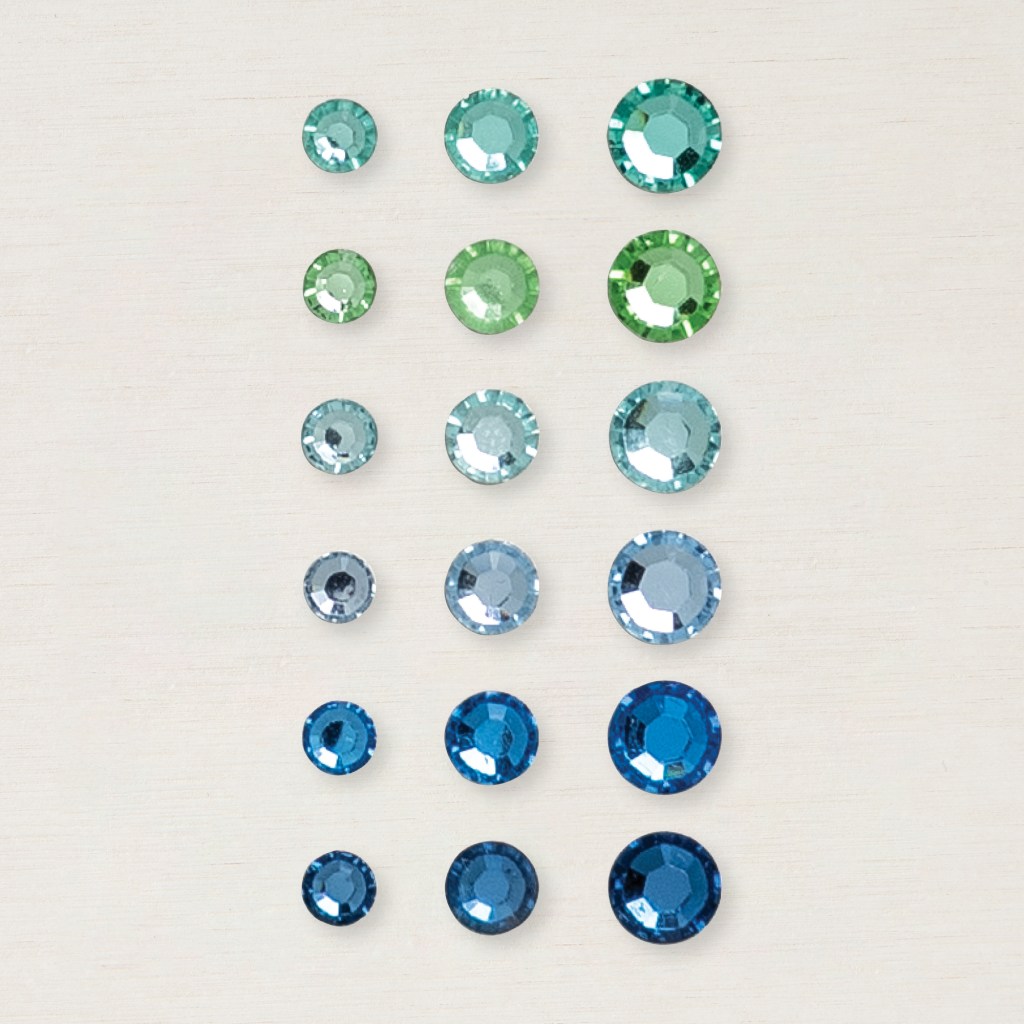
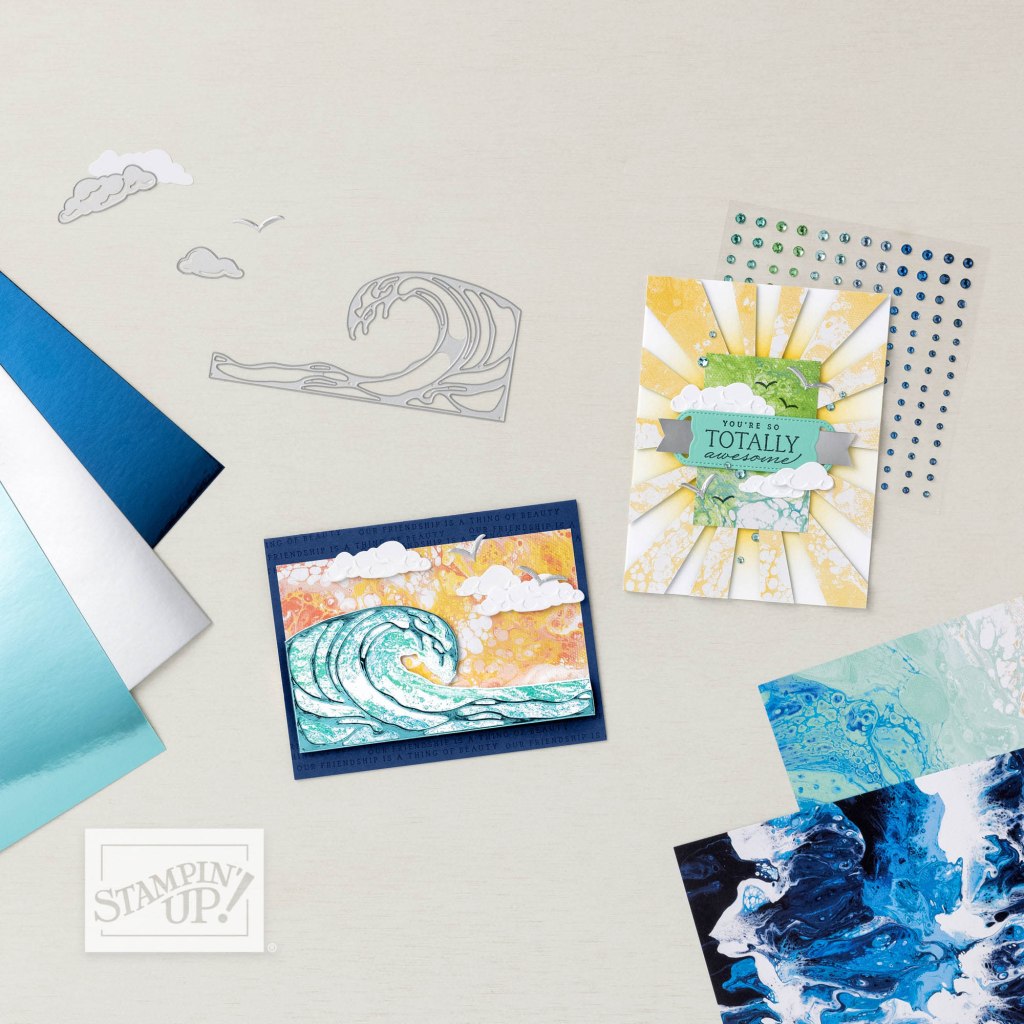
Stampin’ Up!’s latest offering (available today) is the Waves of the Ocean collection. The color combinations are fantastic, the stamp set and coordinating dies are beautiful, the colored rhinestone may have made me squeal with delight, and I’ll say the DSP is stunning (I’ll leave it at…I could go on and on.) Here are the products in the collection:
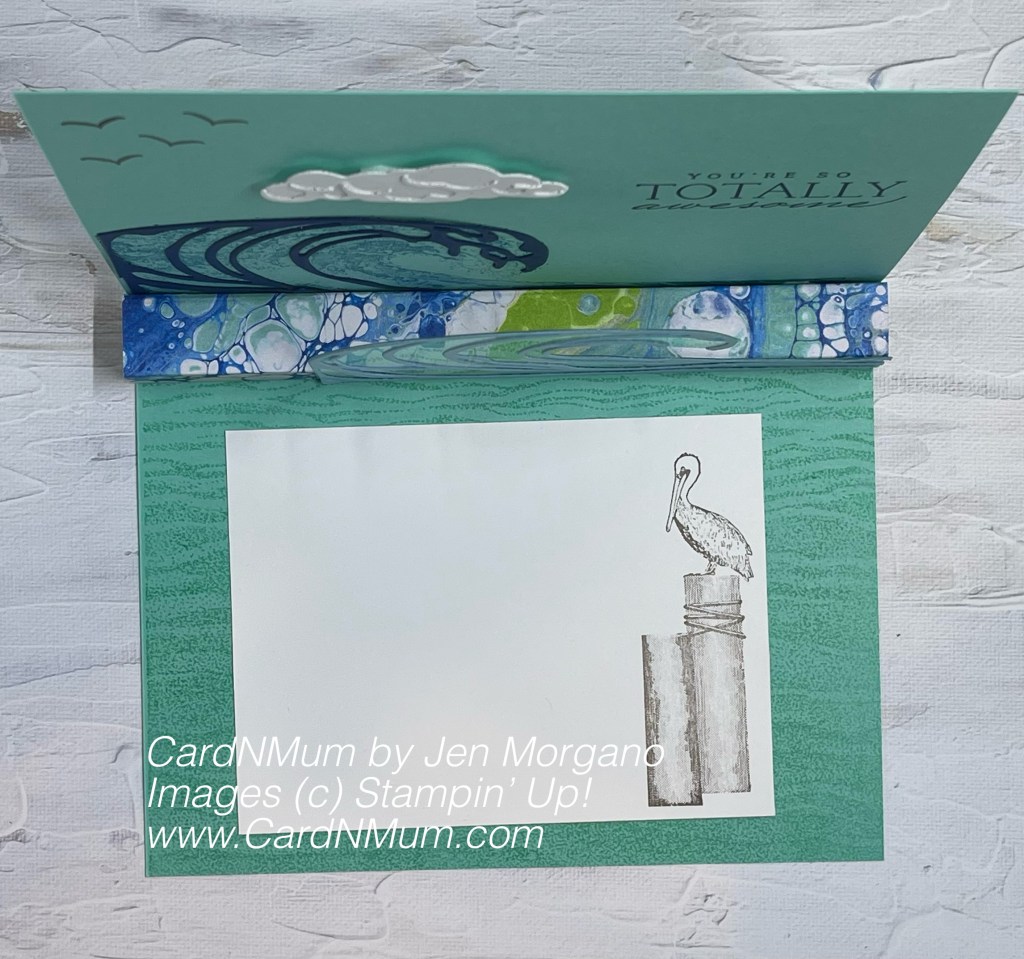
I joined a swap for this collection (I had early access because I’m a demonstrator) and I didn’t know what to do with all this greatness. I wanted to use everything….but I kept spinning my wheels. I wanted to make an over-the-top card with crashing waves and fancy folds all while making it interactive. I was driving myself nuts.
So I took a few days off, came back to the crafting table, and just started playing with the products. I kept the front of my card somewhat ‘simple’ and kept the fun for the inside:
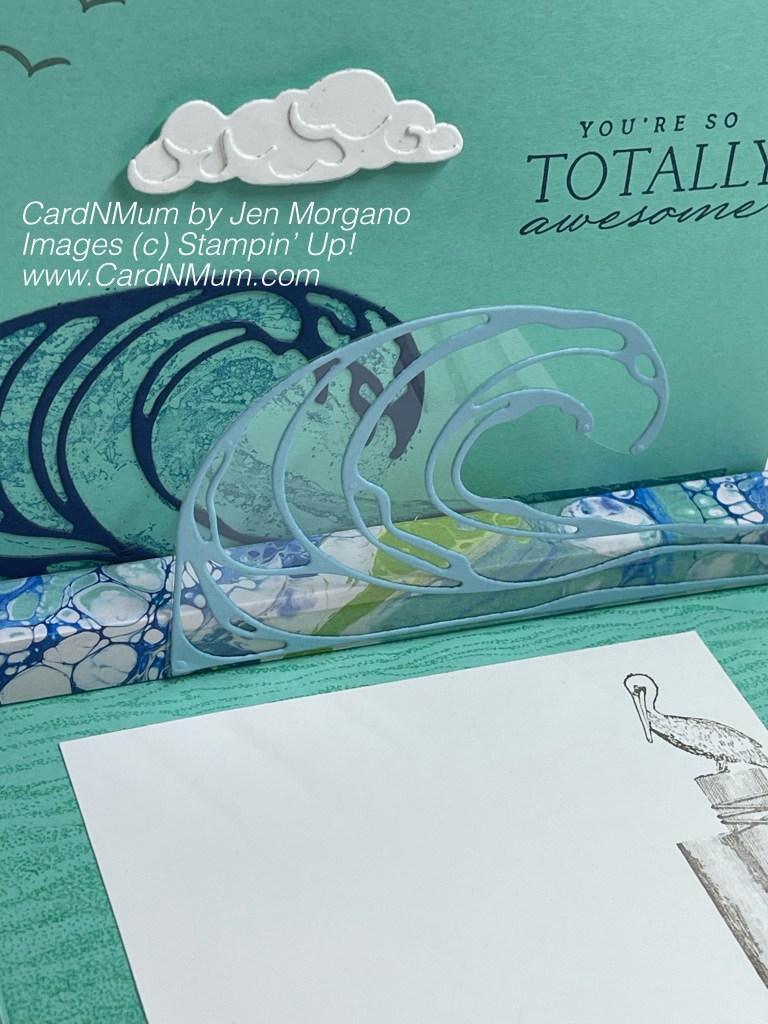
I wanted to make my waves come alive – I mean look at those dies – how could you not what them to stand up?! I used a simple mechanism to make one of my waves do just that – I love it! Here it is from above:
Here are the supplies needed to make this card:
- Card base: 4 1/4″ x 11″ Coastal Cabana cardstock, scored at 5 1/2″
- Card front: 5 1/4 x 4 1/8″ Night of Navy cardstock (embossed using Tasteful Textile 3D folder); 7″ Silver Mesh Ribbon; (3) Granny Apple Green cardstock at 3 1/4″ x 1 1/4″; (3) Waves of the Ocean DSP at 3″ x 1″; a scrap of Night of Navy, Versamark ink, Basic Embossing Powders (silver), Rhinestones Waves Basic Jewels (Dimensionals, Multipurpose Glue, Heat Tool, Stampin’ Cut & Emboss Machine)
- Inside Card: Basic White cardstock at 3″ x 4″ (writing panel) and some scraps for the cloud; 5 1/2″ x 2″ Waves of the Ocean DSP (scored at every half inch); 2 1/2″ x 5″ pieces of Night of Navy and Balmy Blue cardstock (waves), 2 1/2″ x 5″ piece of window sheet; Waves of Inspiration Bundle; Gentle Waves Background Stamp; Early Espresso, Pacific Point, Coastal Cabana, and Night of Navy inks; Tear & Tape, Multipurpose Glue, Adhesive Sheets, and Mini Dimensionals
To make this card, I followed these steps:
- I stamped the inside of the card first – Coastal Cabana ink with the Gentle Waves stamp on the panel where the writing will go; the wave with Pacific Point on the ‘top’ portion of the inside; I used Night of Navy for the sentiment in the upper right-hand corner and Early Espresso for the birds in the upper left-hand corner; I also stamped my pelican in Early Espresso for the writing panel
- Next, I ran my large Night of Navy panel through with the Tasteful Textile EF. I wrapped my silver mesh ribbon around the center (horizontally) of this piece and secured it to the back using transparent tape. I then adhered this panel to the card front using multipurpose glue.
- I layered the 1″ x 3″ pieces of DSP on the 1 1/4″ x 3 1/4″ pieces of Granny Apple Green with liquid glue. I adhered these to the Night of Navy layer using Dimensionals.
- I stamped my sentiment in Versamark on a scrap of Night of Navy and then covered it with silver embossing powder – I heat set using the Heat Tool. I snipped close to the words and affixed using a Mini Dimensional on the rightmost side and liquid glue on the rest.
- I finished the card front with some rhinestones
- I cut two waves out using the dies and the Night of Navy and Balmy Blue pieces. I affixed Adhesive Sheets to the back of these pieces of card stock so I didn’t have to play with glue to adhere them to the card. I adhered to the Night of Navy piece over the Pacific Point Wave I stamped. I adhered the Balmy Blue to the window sheet piece and fussy cut around the wave shape.
- I took the scored piece of DSP (5 1/2″ x 2″) and put Tear & Tape along the left- and right-most edges. I removed the right-most backing of the Tear & Tape and placed face down on the part of the inside of the card where the writing panel would go. I then folded the piece of DSP in half, removed the remaining backing of the Tear & Tape, and closed the card (so that it would adhere top part of the inside of the card) When you open the card, this DSP will form a little box. I applied a piece of Tear & Tape to the back of the Balmy Blue/Window Sheet wave and affixed it to the front of the DSP ‘box’, over a bit. I trimmed off whatever happened to be hanging over the edge of the card.
- I cut and assembled the cloud (using liquid glue) and adhered to the card using Mini Dimensionals.
- I adhered the writing panel using liquid glue.
You can purchase the new collection here (Click on the caption – I’m trying to be clever – haha) or click on the captions on the individual product’s captions above:
Here are the products I used in addition to the products in the collection to make this card (they link to my online store).
Product List


")


Thank you so much for stopping by and taking a look at my projects. I’d love to see yours so feel free to drop them in the comments.
Don’t forget to enroll in the Stampin’ Rewards program to build up discounts on your next purchase.
Here are links to my other social media sites – I’d love for you to follow me there, too!
Join my Facebook group
Follow me on Instagram
Follow me on Pinterest
Have a great day – and I hope you get to do something crafty!
Thanks for looking and if you like what you see, please subscribe:
Happy crafting!
One Comment