March 2022 Paper Pumpkin Kit (and Alternative)
I lucked out and received my March Paper Pumpkin kit on Friday. So what did I do – I ignored all of my usual weekend housekeeping and ran to my craft space. Ok….not really – I trotted there after a few loads of laundry.
This kit is gorgeous – the colors are great. I mean, we all know that I’m partial to Misty Moonlight – but for real, the colors are great.
When I start my Paper Pumpkin adventure every month, first things first; I make the cards per the instructions. One of the recent format changes that Stampin’ Up! has made to the Paper Pumpkin instructions has been to lay out each card separately with visual instructions. Yes…step-by-steps with pictures. Now, I’ve been card-making for a while and I will openly admit that sometimes in the past, some of the instructions in the Paper Pumpkin kits left me scratching my head. Like, “How did you get from there to there?” The new instruction-style ends that confusion. So, if you’re a beginner crafter, have no fear – you’ll do fine.
Here are closer pics of each card made per the instructions:
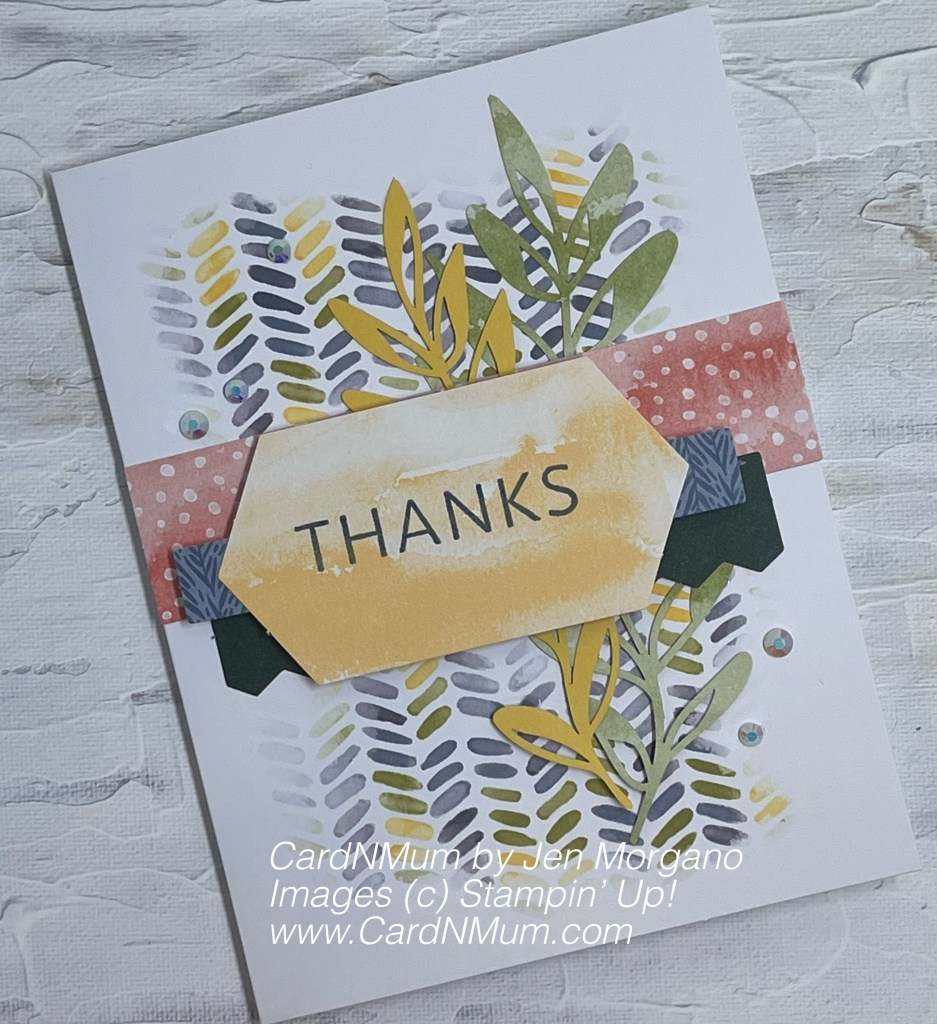

Which one is your favorite? I am leaning towards the last one – but in all honesty, each one is spectacular. When a kit is as pretty as this one, I do hesitate to make any alternatives. I really can’t bring myself to cut up those gorgeous cards. But I also think that one of the best things about the Paper Pumpkin kits is the starting point it gives crafters to go out and make it there own.
So…I took a baby step towards an alternative. I tell people that getting a pack of the Basic White Assorted Memories and More Cards and Envelopes can help extend the life of any Paper Pumpkin kit. Using some other supplies I had on hand, I made the below alternative:
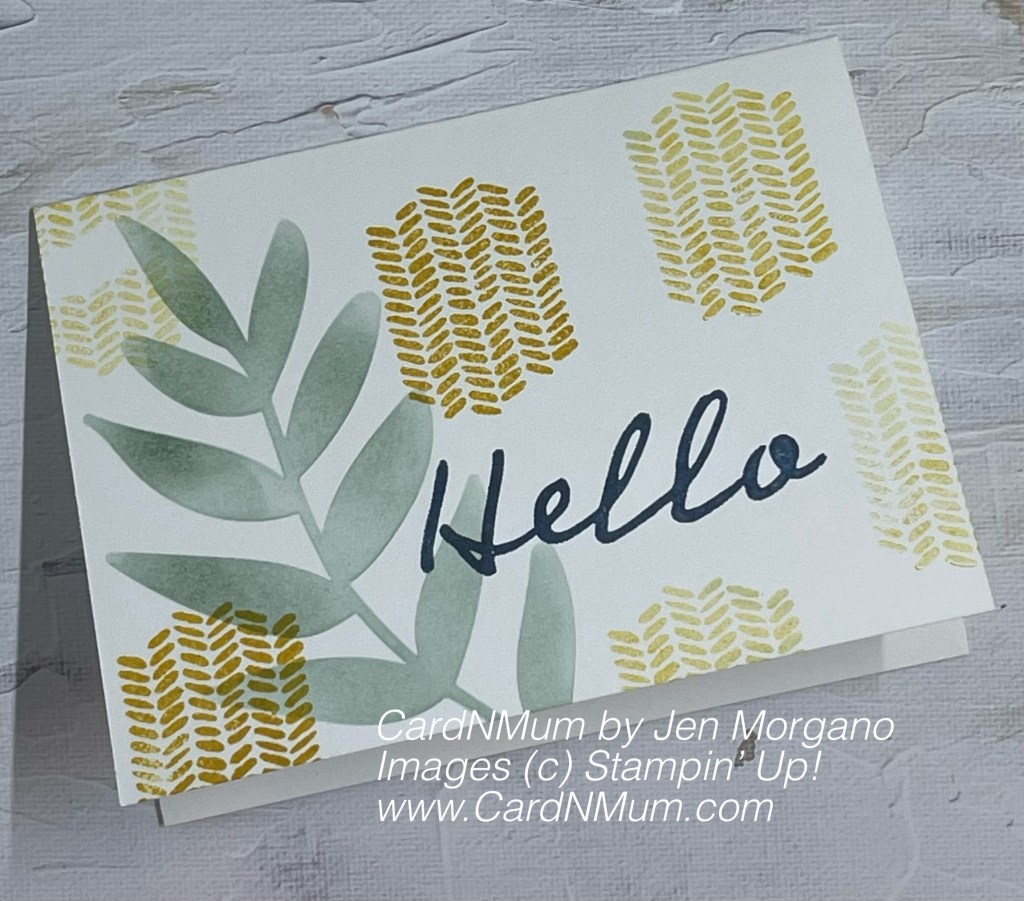
I used the smaller of the cards in the card pack, two more ink pads (besides the Misty Moonlight Ink Spot included), a blending brush, and the stamp set from the kit to make this quick alternative.
I used the outline left over by one of the punched-out pieces to get the leaf. It’s a great idea – I saw it first used by fellow demonstrator Tonya Byrd (check out her Instagram page here). It’s genius and I love it and will probably use it every chance I get. I used a blending brush and Evening Evergreen to add the leaf to the card front. I then used the background stamp from the kit and stamped it in Bumblebee across the card front. I stamped off here and there to vary the look. I then finished off with the sentiment in Misty Moonlight. Pretty easy and done in minutes.
Here are some links to those extra products I used together with this month’s Paper Pumpkin to create this alternative. I’ve also included links to the prepaid PP subscriptions if you’d like to sign up. There is also the option to subscribe monthly – you can do so here. Contact me with any questions.
Product List


Thank you so much for stopping by and taking a look at my projects. I’d love to see yours so feel free to drop them in the comments.
Don’t forget to enroll in the Stampin’ Rewards program to build up discounts on your next purchase.
Here are links to my other social media sites – I’d love for you to follow me there, too!
Join my Facebook group
Follow me on Instagram
Follow me on Pinterest
Have a great day – and I hope you get to do something crafty!
Thanks for looking and if you like what you see, please subscribe:
Happy crafting! And you want to see any types of projects or techniques in particular, please reach out with your ideas!