Monochromatic Hand-Penned
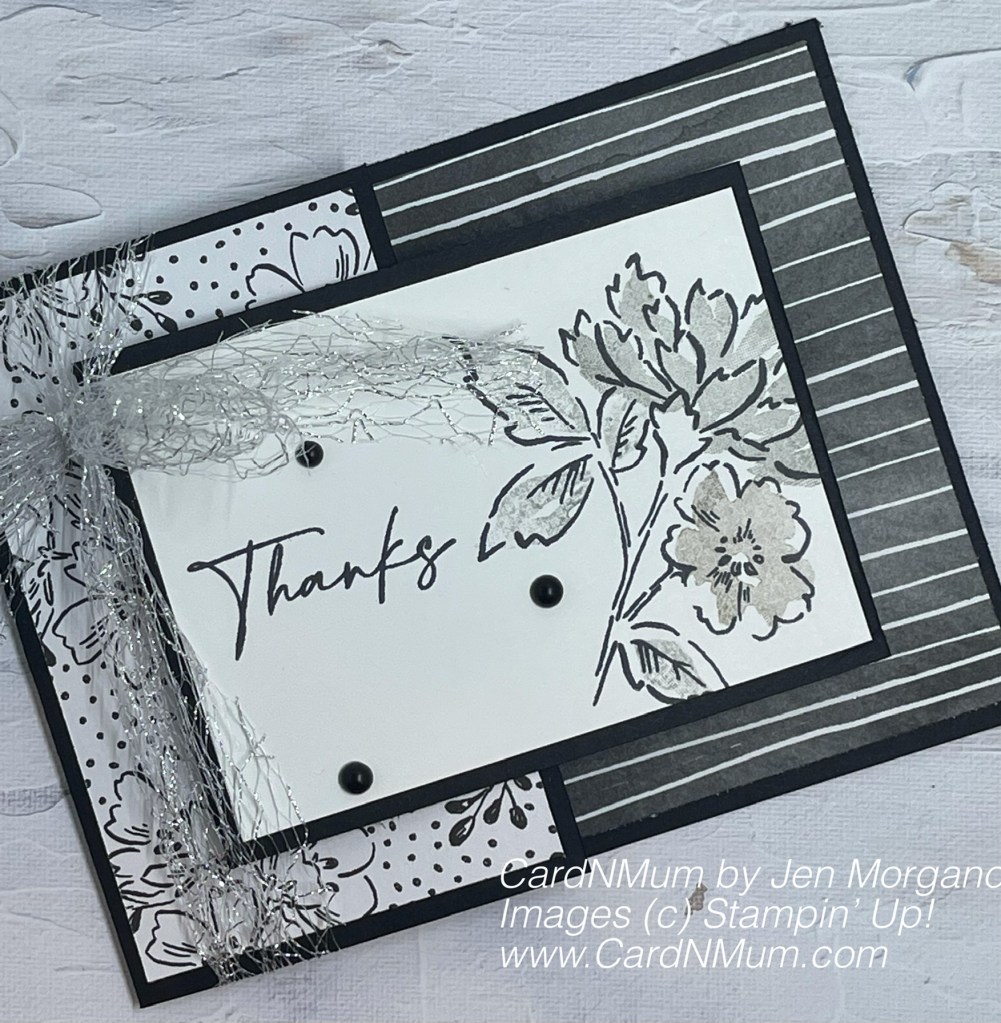
The Hand-Penned Suite was one of the first items I ordered when the new annual catalog launched – the flowers are drawn beautifully drawn. The art reminds me of a watercolor that my mother used to have hanging.
The suite comes with Designer Series Paper – the colors (mostly from the Subtles family) are great for capturing a spring or summer-time feeling. Stampin’ Up! built on this suite by offering a pack of DSP called Beautifully Penned during Sale-A-Bration. It’s just as lovely as the original DSP – but —– it’s black and white! I had to use the two together (I mean, you have to, right? haha)
I put this ‘joy fold’ card together using Basic Black and White cardstock, the Beautifully Penned DSP, and Tuxedo Black, Basic Gray, Smoky Slate, and Gray Granite ink. I added some flare with the Matte Black dots and the Metallic Mesh Ribbon.
To make the card, you’ll neeed:
- 1 piece of Basic Black cardstock: 8 1/4″ x 4 1/4″ (scored at 2 3/4″ on the long side)
- 1 piece of Basic Black cardstock: 8″ x 3″ (scored at 4″)
- 2 pieces of Basic White cardstock: 2 3/4″ x 3 3/4″ each
- 1 piece DSP: 4″ x 5 1/4″
- 1 piece DSP: 4″ x 2 1/2″
- 1 piece DSP: 2 3/4″ x 3 3/4″
- 2 pieces DSP: 1/2″ x 3 3/4″ (Optional)
To assemble:
- Adhere large piece of DSP to larger card base (I used glue)
- Adhere the 4″ x 2 1/2″ piece of DSP to the outside of the card flap of the larger card base (This card base should close from left to right)
- Adhere one piece of Basic White to the inside of the smaller card – this card should close from the right to the left (If you want to, you can adhere the little pieces of DSP on the top and bottom of the Basic White – see pic below)
- Adhere the 2 3/4″ x 3 3/4″ piece of DSP opposite the Basic White piece on the inside of that smaller card
- Stamp your image and sentiment on the last piece of Basic White and adhere to the front of the smaller card
- Use a few Matte Black Dots on that sentiment piece
- Glue the smaller card to the center of the large card base
- I used a length of Metallic Mesh Ribbon to help secure the flap of the smaller card closed (I tied a bow and then just tucked that guy right in there)
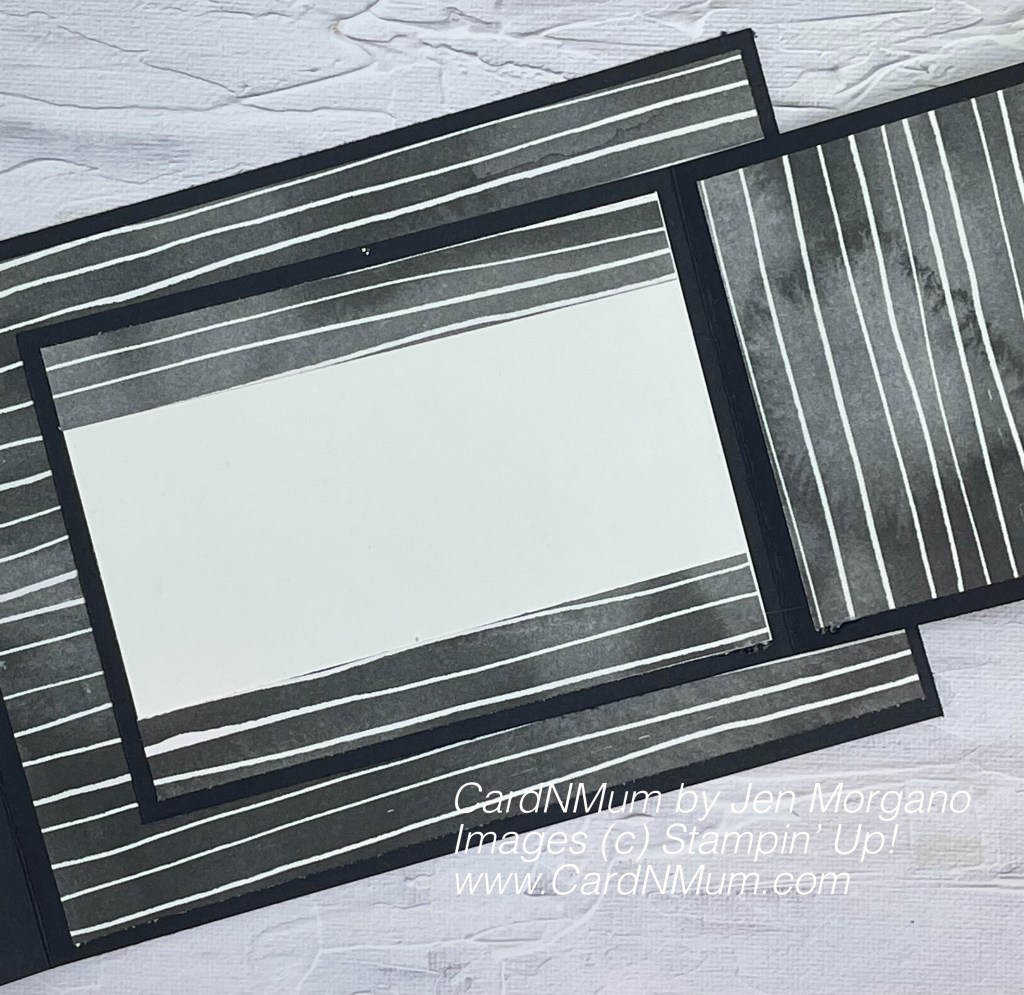
Here’s the inside – can you guess what lesson I learned when using abstractly lined DSP? haha
I want to try making a card with this paper and some of our coloring tools – maybe those new pastels. How would you use this paper?
Here are the links to the products I used to make this card – they are available now at my online shop – the DSP is free when you spend $50. Please use hostess code 4KCKADD7 at check out. If your order is over $150, don’t use that hostess code and enjoy those Stampin’ Rewards.
Product List")
 Designer Series Paper")


Thanks for looking and if you like what see, please subscribe: