Taco Fiesta Birthday Card
I know – I should have posted this tomorrow – Taco Tuesday, after all. I just couldn’t wait to share it with you.
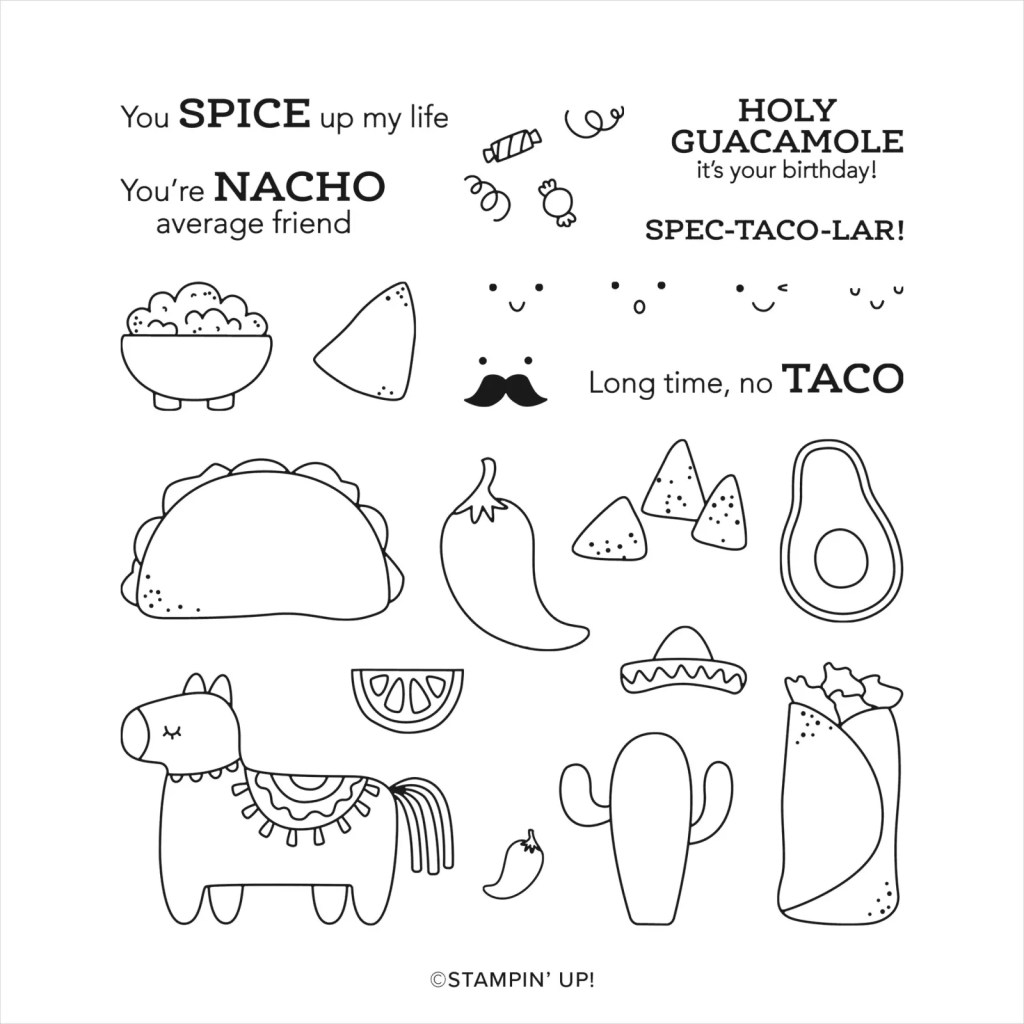
Do you have the Taco Fiesta stamp set? I knew I had to have it right away. It was just soooo cute!
To make this project, you’ll need the following supplies:
Cardstock/Paper: Real Red (8 ½” x 5 ¼”, scored at 2” and 6”; scrap at least 1” x 4”), Granny Apple
Green (5 ½” x 4 ¼”, 3 ½” x 2 ¾, scrap at least 1” x 4”), Basic White (3” x 2 ½”, 4 ¼” x 3 ½”, scrap),
Daffodil Delight (5” x 2 ¼”, 5” x 1 ¾”, scrap at least 1” x 4”)
Ink: Memento Tuxedo Black, Real Red, Wild Wheat
Basic Tools: Snips, Trimmer, Adhesives (Glue, Glue Dots, Dimensionals)
Additional Tools/Supplies: Blends in Light Medium 900, Real Red, Granny Apple Green, Daffodil
Delight, Old Olive, and Smoky Slate; Stampin’ Cut & Emboss Machine
Stamps/Dies: Taco Fiesta Stamp Set, Beautiful Balloons Dies
To make this project, follow these steps:
Stamp pinata image on a scrap of Basic White cardstock and color in using desired Stampin’
Blends. Fussy cut image out.
Stamp “three nachos” image on the two larger pieces of Daffodil Delight card stock using Wild
Wheat ink.
Cut out fringe from the 3 1” x 4” scraps of Real Red, Granny Apple Green, and Daffodil Delight
using the long ‘fringe’ die from the Beautiful Balloons dies.
Stamp sentiment on the 4 ¼” x 3 ½” piece of Basic White in Real Red. Stamp the molcajete
(guacamole) image and avocados in Memento Tuxedo Black. Color in as desired.
Adhere the smaller flap of the Real Red piece to the larger center piece. I used Tear & Tape and
only adhered the edges down. This will form a pocket for your sentiment panel to slip in and out
of. Adhere the Daffodil Delight panels to the front flaps of the Real Red piece and then the Real
Red piece to the Granny Apple Green panel.
To assemble the ‘fringe’ front piece, I adhere the three fringe pieces to the 3” x 2 ½” piece of
Basic White. There will overhang – you can trim this. I also started at the bottom and worked my
up with each layer so that the fringe hung correctly. Adhere this piece to the Granny Apple
Green mat.
Adhere the fringe panel to the flap on the card front making sure to only add adhesive to the
upper part of the panel.
Finish off by mounting your pinata with some Dimensionals.
Here a video of the process:
Here are the links to the products that I’ve used:
Product List")


Thank you so much for stopping by and taking a look at my projects. I’d love to see yours so feel free to drop them in the comments.
Don’t forget to enroll in the Stampin’ Rewards program to build up discounts on your next purchase.
Here are links to my other social media sites – I’d love for you to follow me there, too!
Join my Facebook group
Follow me on Instagram
Follow me on Pinterest
Have a great day – and I hope you get to do something crafty!
Thanks so much for taking a look – please subscribe if you like what you see!