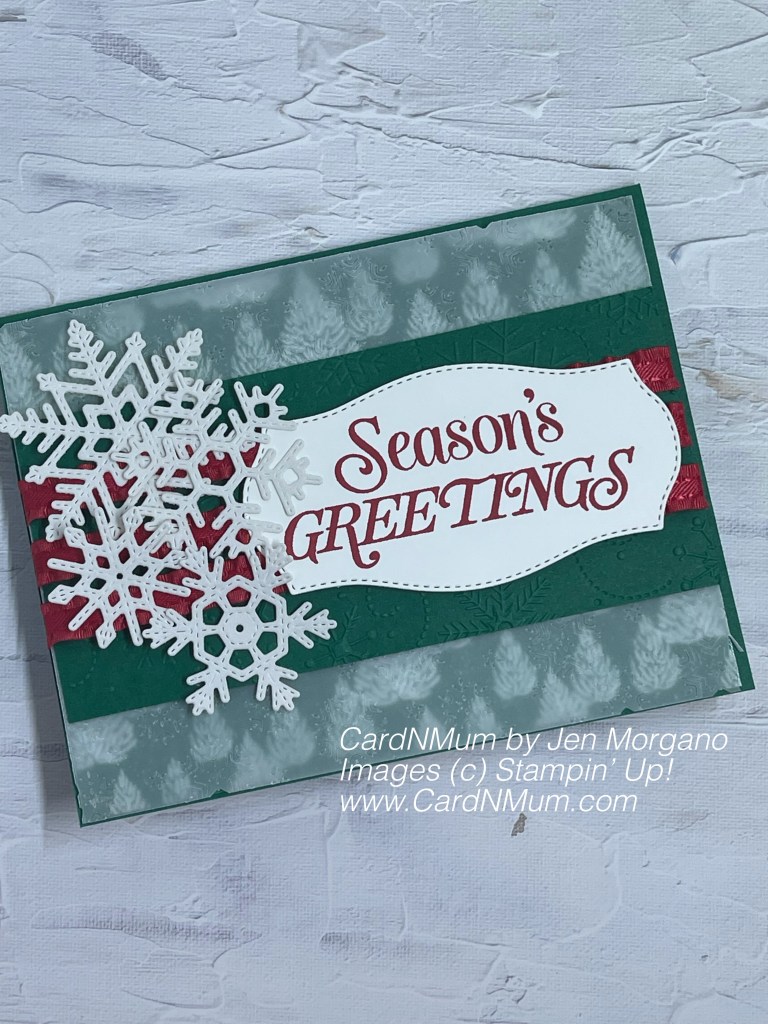
October 2021 Paper Pumpkin Alternative – #2

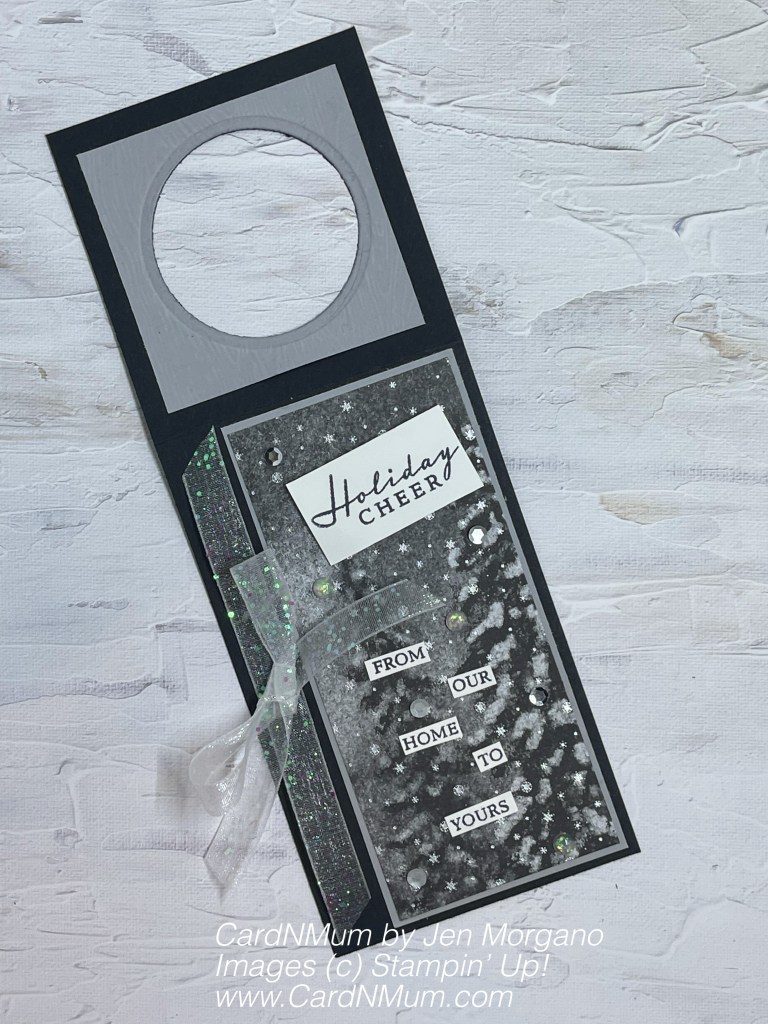
After making my first alternative for October’s kit, I was getting ready to make the rest of the cards per the instructions – but …. another idea popped in my head as I tidied my work area: a wine tag!
I used similar measurements to an earlier wine tag I made this year (see post here). Here’s how I created this one:
- Trimmed a piece of Basic Black cardstock to 3″ x 8″ and scored at 3″ along the 8″ side
- Trimmed a Paper Pumpkin card front to 2 1/8″ x 4 3/4″; trimmed a piece of Smoky Slate cardstock to 2 1/4″ x 4 7/8″ – I layered these using Tear N Tape
- Trimmed a piece of Smoky Slate cardstock to 2 1/2″ x 2 1/2″ and ran through Stampin’ Cut & Emboss Machine with 3D Timber Embossing Folder. Adhered to 3″ x 3″ portion of tag and ran through machine again with a circle die from Layering Circle Dies set
- Adhered layered cardfront/cardstock piece to right side of tag using Tear N Tape – using glue dots, I adhered a strip of the Glittered Organdy ribbon to the left side of the tag (then I tied a bow and adhered that to center using another glue dot)
- Stamped sentiments on a scrap of Basic White and trimmed with my snips – adhered using glue dots
- Finished up with Subtle Shimmer Sequins (using glue dots) and Opal Rounds
It’s almost gift giving season – these would be perfect for a bottle or two, don’t you think?
Thank you so much for stopping by and taking a look at my projects. I’d love to see yours so feel free to drop them in the comments.
Don’t forget to enroll in the Stampin’ Rewards program to build up discounts on your next purchase.
Here are links to my other social media sites – I’d love for you to follow me there, too!
Join my Facebook group
Follow me on Instagram
Follow me on Pinterest
Have a great day – and I hope you get to do something crafty!
If you don’t have the October Paper Pumpkin kit – have no fear. The Peaceful Place DSP will get you the same effect – and you can use sentiments from any set you have!
Product List


 Glittered Organdy Ribbon")


 Specialty Designer Series Paper")
Thanks for looking and if you like what you see, please subscribe:
Happy crafting!